Welcome to Amateur Radio
The ARRL Ham Radio License Manual, free PDF on the Internet Archive, guides beginners through the Technician exam; It covers fundamentals, regulations, and study tips, making the path to a ham license clear and affordable for new operators. It also includes practice quizzes!!
Radio and Signals Fundamentals
The ARRL Ham Radio License Manual dedicates a chapter to Radio and Signals Fundamentals, forming the bedrock for the Technician exam. This section explains the nature of radio waves, the relationship between frequency and wavelength, and the organization of the electromagnetic spectrum. It details modulation types such as AM, FM, and SSB, essential for understanding how voice and data are transmitted. Bandwidth requirements, signal reports (RST), and transceiver block diagrams are covered thoroughly. Concepts including harmonics, spurious emissions, and duty cycle are introduced to ensure compliant operation. The Internet Archive PDF version includes diagrams illustrating wave propagation and spectral purity. Reddit discussions emphasize mastering wavelength calculations and band edge definitions found here. Free online classes often animate sine waves and spectrum analyzer views to clarify these concepts. The question pool draws heavily from this material, testing knowledge of deviation, deviation ratio, and modulation index. Thorough study of this chapter builds the foundation for advanced topics like antennas, feed lines, and propagation mechanics later in the manual. Students should review the mathematical formulas for calculating wavelength from frequency and vice versa, as these appear frequently. Understanding the differences between peak envelope power and average power is also vital. The manual provides examples of how to identify signal distortion and over-modulation on an oscilloscope display. Additionally, the text covers digital modulation basics like FSK and PSK, which are relevant for modern modes such as FT8 and PSK31. Memorizing the ITU phonetic alphabet is also included in this segment for all operators today!!

Electricity, Components, and Circuits
The ARRL Ham Radio License Manual provides a comprehensive introduction to basic electrical theory required for the Technician examination. This chapter defines voltage, current, resistance, and power, alongside Ohm’s Law and Power Law calculations essential for circuit analysis. It distinguishes between direct current (DC) and alternating current (AC), explaining RMS values and phase relationships. Component identification is a major focus: resistors, capacitors, inductors, diodes, and transistors are described with their schematic symbols and basic functions. The text explains series and parallel circuits, voltage dividers, and the behavior of RC and RL time constants. Semiconductor physics covers PN junctions, bipolar junction transistors (BJTs), and field-effect transistors (FETs), including biasing and amplification classes. Digital logic gates, flip-flops, and microcontroller basics appear in newer editions reflecting modern exam pools. The Internet Archive PDF includes color resistor code charts and schematic reading exercises. Reddit users often recommend supplementing this chapter with online circuit simulators to visualize current flow; Practice tests heavily feature questions on calculating total resistance, capacitance, and inductance in various configurations. Understanding schematic diagrams is critical for the “station setup” questions later. The manual also covers battery chemistries, power supply rectification, filtering, and regulation circuits. Safety aspects like fuse ratings and wire gauge selection are introduced here but expanded in the Safety chapter. Mastery of decibel (dB) calculations for gain and loss is also required. This section builds the analytical skills needed for the RF circuits and antenna tuning discussions found in subsequent chapters of the guide today!!
Propagation, Antennas, and Feed Lines
The ARRL manual explains radio wave propagation characteristics vital for the Technician license. It covers line-of-sight, ground wave, and ionospheric skip modes affecting VHF, UHF, and HF bands. Solar cycle impacts on the F-layer, sporadic-E, and ducting phenomena are detailed with practical operating tips. Antenna theory includes wavelength, frequency, and velocity factor calculations. The half-wave dipole, quarter-wave vertical, Yagi, and quad antennas are analyzed for radiation patterns, gain, and front-to-back ratio. Feed line theory addresses characteristic impedance, velocity factor, and attenuation per 100 feet for coaxial cable and ladder line. Standing Wave Ratio (SWR) measurement, reflection coefficient, and return loss concepts are explained with formulas. Antenna tuners, baluns, and matching networks like the gamma match and T-match are described for impedance transformation. The manual includes construction projects for simple dipoles and J-poles using common materials. Safety guidelines for antenna installation, tower climbing, and lightning protection grounding systems are emphasized. Reddit discussions suggest using antenna modeling software like EZNEC or 4NEC2 to visualize patterns discussed in the text. The Internet Archive PDF provides Smith chart basics for advanced impedance matching visualization. Practice exams test knowledge of coaxial connector types (PL-259, N, SMA), cable loss comparisons (RG-58 vs RG-8 vs LMR-400), and calculating electrical length versus physical length. Understanding polarization mismatch losses and near-field vs far-field regions completes this critical RF engineering section for new hams today!!! This ensures effective station setup and contacts across amateur bands for Techs!!

Amateur Radio Equipment
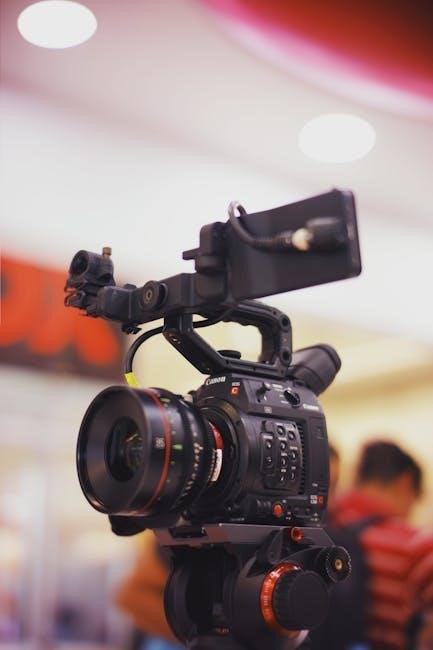
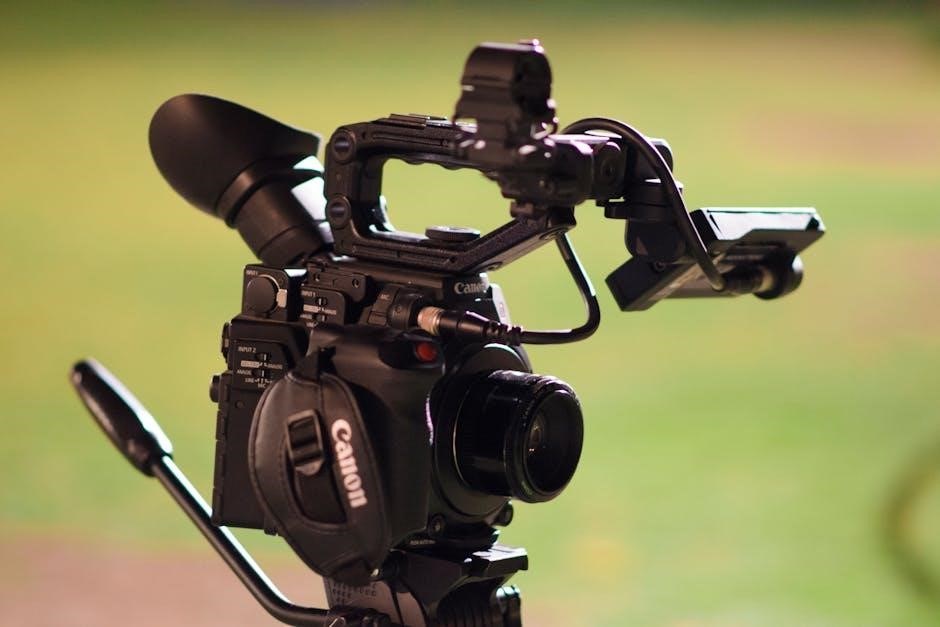
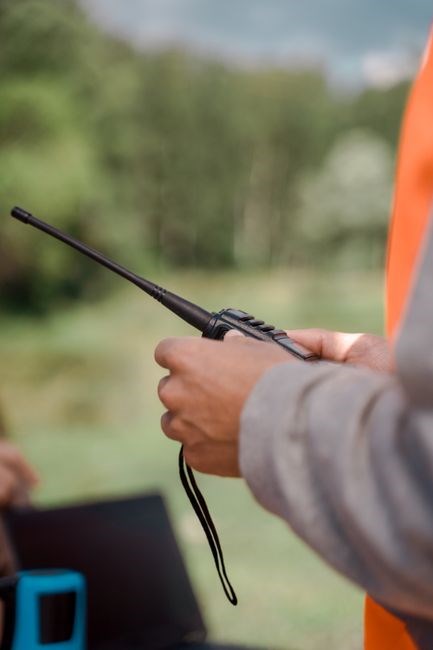
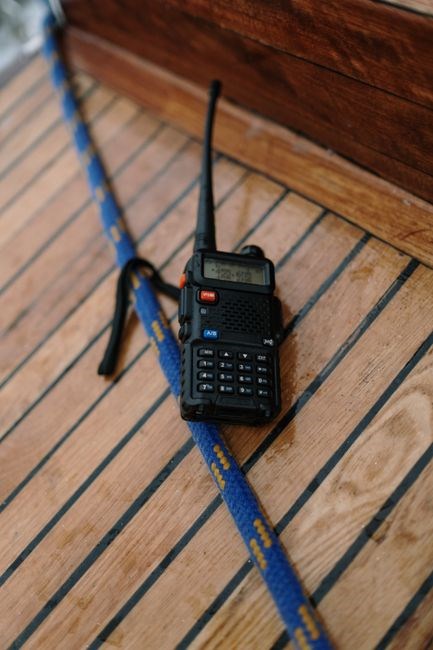
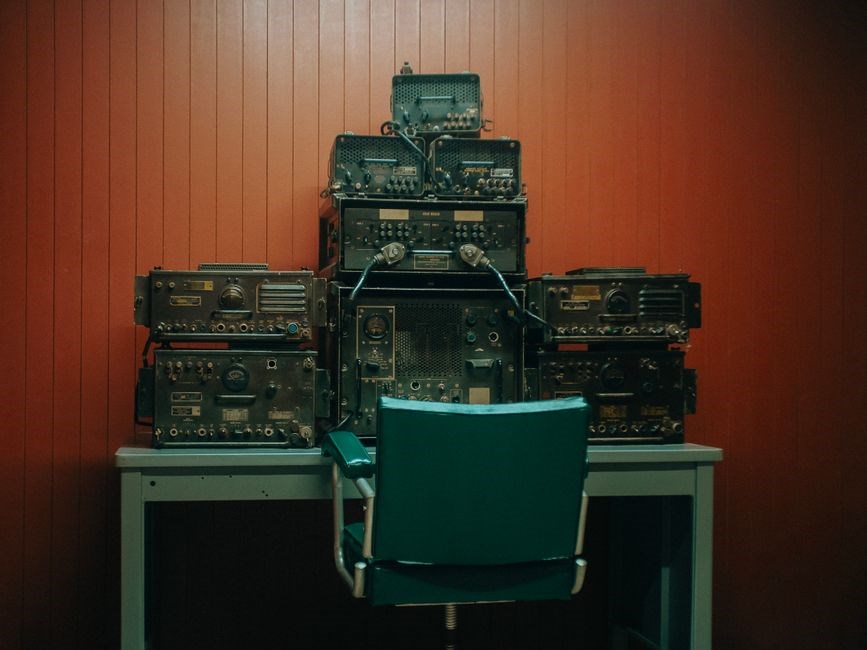
The ARRL Ham Radio License Manual (free PDF) introduces essential gear: a handheld or base transceiver, power supply, microphone, antenna, feed line, and basic accessories. It explains key specs, connectors, and how to set up a compliant station for the Technician exam. Enjoy!
Communicating with Other Hams
The ARRL Ham Radio License Manual 5th Ed. dedicates a comprehensive section to Communicating with Other Hams, detailing practical skills essential for on-air success. This chapter explores diverse activities available to Technician licensees, from local simplex chats on VHF/UHF repeaters to long-distance DX contacts via satellite or digital modes like FT8 and PSK31. It explains standard operating procedures, including the NATO phonetic alphabet, common Q-signals, and proper repeater etiquette yielding to emergency traffic. The manual emphasizes finding local clubs, Elmer mentors, and scheduled nets, crucial for mentorship and emergency communication readiness like ARES or RACES. It covers band plans, frequency coordination, and the nuances of contesting, fox hunting, or public service events. Readers learn about signal reports (RST), logging contacts, and confirming QSOs via QSL cards, eQSL, or Logbook of The World. The text integrates FCC rules regarding station identification, third-party traffic agreements, and prohibited communications like music or encryption. Practical tips for microphone gain, audio levels, and troubleshooting common RF feedback issues are included. This section bridges the gap between passing the exam and becoming a confident, courteous operator ready to join the global amateur community. The manual serves as the primary reference for these essential soft skills, supplementing the question pool with real-world context. Highly recommended by Reddit instructors and Amazon reviewers for exam prep.
- Free PDF versions on Internet Archive offer accessible study material. The 2023 edition includes updated band plans and digital modes.
- Reddit communities discuss effectiveness of online classes versus local clubs for learning these skills.
- The Operating Manual companion dives deeper into advanced operating techniques and awards!!
Licensing Regulations

The ARRL Ham Radio License Manual 5th Edition dedicates a detailed chapter to Licensing Regulations, explaining every step a new Technician must follow to obtain a Federal Communications Commission (FCC) amateur radio license. It begins with the eligibility requirements: the applicant must be at least 13 years old, must not be a non‑U.S. citizen without proper authorization, and must possess a valid mailing address for the FCC database. The manual walks the reader through the online application process via the FCC’s Universal Licensing System (ULS), describing how to create an FCC ID, fill out FCC‑Form 605, and pay the $35 licensing fee electronically. It clarifies the difference between the three license classes—Technician, General, and Amateur Extra—highlighting the privileges and frequency allocations each class receives. Special emphasis is placed on the rules governing third‑party communications, ensuring that a Technician may only transmit third‑party messages on frequencies where such operation is permitted. The chapter also outlines the mandatory station identification requirements: every transmission must end with the operator’s call sign, followed by the appropriate suffix when operating a club station or a repeater. It explains the 10‑meter, 20‑meter, and 40‑meter band plans, the use of band‑specific emission designators, and the prohibition of encrypted or coded transmissions except for authorized control of satellites. This summary ensures readers understand licensing steps, fees, renewal deadlines clearly!.
Operating Regulations
According to the ARRL Ham Radio License Manual 5th Edition, operating regulations define how a Technician‑class amateur may use the radio spectrum responsibly and legally. The manual emphasizes that every transmission must end with the operator’s FCC‑assigned call sign, repeated at least once every ten minutes during a continuous broadcast and at the end of each communication. Power limits are clearly listed: on the 2 meter band (144–148 MHz) a Technician may transmit up to 200 watts PEP, while on the 70 centimeter band (420–450 MHz) the limit is 1500 watts PEP, provided the station complies with the antenna gain restrictions in §97.313(b). Emission designators such as A3E for voice, J3E for single‑sideband, and F3E for FM are explained, and the manual warns that any encrypted or coded transmission is prohibited except for control of a satellite or a space station under specific conditions. The text outlines the band‑plan etiquette: primary use of the 146–148 MHz segment for voice, the 144–146 MHz segment for data and packet, and the 144.0–144.1 MHz sub‑band for repeater input. It also details the rules for third‑party traffic, stating that a Technician may only relay third‑party messages on frequencies where such operation is authorized, and must obtain written consent from the originating station. The manual describes mandatory use of a proper antenna grounding system to prevent RF exposure, and it reiterates the need to observe the “no‑interference” rule, meaning any harmful interference to other services must be ceased .
Safety
The ARRL Ham Radio License Manual dedicates a chapter to safety, emphasizing that protecting oneself, family, and the public is a fundamental duty of every licensee. Radio frequency (RF) exposure compliance follows FCC OET Bulletin 65 and §1.1310; the manual supplies the Maximum Permissible Exposure (MPE) tables for controlled and uncontrolled environments and walks through the step‑by‑step calculation of compliance distance for common VHF, UHF, and HF antennas, including duty‑cycle considerations for digital modes. Electrical safety requires adherence to the National Electrical Code (NEC) Article 810: all station equipment must be bonded to a proper ground system using heavy‑gauge copper wire, AC circuits need ground‑fault circuit interrupter (GFCI) protection, and power supplies should be fused on the DC output side. Antenna and tower work demands strict fall‑protection protocols per OSHA 1926.502, including a full‑body harness, lanyard, and inspected guy wires, turnbuckles, and anchor points; lightning protection specifies a ground rod at the tower base, coaxial surge arrestors bonded to the entrance panel, and a routine to disconnect feed lines during thunderstorms. Battery safety covers ventilation for hydrogen‑emitting lead‑acid cells, thermal‑runaway prevention for lithium‑ion packs using fire‑containment bags, and proper disposal methods. The manual also advises keeping a Class C fire extinguisher accessible, posting emergency numbers, and maintaining a written station safety plan reviewed annually to ensure a long, injury‑free amateur radio career. Operators must also post RF exposure warning signs where required, perform regular station inspections for corroded connections, and verify that all family members understand emergency shutdown procedures for the station now

Study Resources and Exam Preparation
The free ARRL Ham Radio License Manual PDF on Internet Archive offers the full Technician syllabus, index, and practice quizzes. Complement it with the official question pool, online video classes, and ARRL’s updated study guides for a focused exam strategy; Enjoy!
ARRL Manual Editions and Updates
The ARRL Ham Radio License Manual has been released in several editions, each reflecting the latest FCC rules, band allocations, and technology trends. The most recent 5th Edition, available as a free PDF on the Internet Archive, incorporates updates published through December 2023, including revised question pools, new propagation notes, and expanded safety sections. Earlier 4th Edition copies, still found on sites like Dokumen.pub, provide a solid foundation but lack the newest regulatory changes introduced after 2020. For instructors, the manual’s companion “Instructor’s Guide” is updated in lockstep with each edition, ensuring lesson plans align with the current exam syllabus. Many clubs distribute printed copies of the latest edition at license‑class meetings, and the ARRL website hosts a searchable index of all past editions, making it easy to compare wording changes over time. When preparing for the Technician exam, candidates should verify that the question pool they are using matches the edition’s publication date, because the pool is refreshed annually and older editions may reference obsolete items such as the former 30‑meter band status. By regularly consulting the official ARRL updates and cross‑checking the edition number on the cover page, aspiring hams can avoid studying outdated material and increase their chances of passing the exam on the first attempt. ARRL also releases errata bulletins and a Live‑Update feed, ensuring users can apply rule changes and band information to their study material.
Free PDF Downloads and Online Classes
The Internet Archive hosts the ARRL Ham Radio License Manual authored by H. Ward Silver as a completely free download, borrow, and streaming resource, providing immediate access to the 5th Edition content covering all Technician exam topics without any purchase required. The Internet Archive entry notes the manual is intended for all newcomers, instructors, and schoolteachers and includes a comprehensive index of advertisers, making it a complete self-study package for the Technician exam candidate. Reddit communities like r/amateurradio frequently discuss the availability of the 5th Edition PDF and debate the effectiveness of online ham radio license classes versus local instruction, often asking where to find the useful free PDF textbook for exam preparation and sharing links. The official ARRL site at www.arrl.org/ham-radio-licensemanual provides supplementary mouse-over resources and links to structured online courses that align perfectly with the manual chapters for guided learning. Older editions, such as the 4th Edition with ISBN 978-1-62595-087-1 found on document sharing platforms like Dokumen.pub, offer alternative study material for budget-conscious learners seeking different explanations. Many aspiring operators combine these free PDFs with video lectures from Ham Radio Prep or KB6NU’s No-Nonsense study guides to reinforce difficult concepts like propagation and regulations. While free downloads are convenient, users must verify the edition matches the current FCC question pool effective July 2026 to avoid studying obsolete material. Streaming options on the Archive let users read on any device instantly, and the borrow feature mimics a library loan for offline study sessions lasting two weeks. Always cross-reference free materials with the latest ARRL errata bulletins to ensure regulatory accuracy before the exam date arrives.

Practice Tests and Question Pools
The ARRL Ham Radio License Manual 5th Edition is marketed on Amazon as a Complete Study Guide with Question Pool to Pass the Technician Class Amateur Radio Exam, ISBN 9781625951557, ensuring every FCC question is reprinted with the correct answer highlighted for efficient memorization and review for all newcomers. The official NCVEC question pool, valid until June 2026, is fully integrated into the manual’s chapter structure so candidates can study theory then immediately test comprehension using the exact wording they will encounter on exam day. The companion website www.arrl.org/ham-radio-licensemanual referenced in the 4th Edition on Dokumen.pub provides online practice exams that simulate the real testing environment, pulling random questions from the current pool to generate unique quizzes every attempt. Reddit users on r/amateurradio often recommend supplementing the manual with free apps like HamStudy.org or HamTestOnline which track weak areas and adapt question selection to focus study time where it matters most. The Internet Archive version of the manual includes the full question pool appendix, allowing borrowers to practice without purchasing the physical book, though users must verify the edition matches the active pool cycle. Many hams suggest taking practice tests daily in the final week before the exam, aiming for consistent scores above 85 percent to build confidence. The manual explains the logic behind each correct answer, turning rote memorization into genuine understanding of regulations, operating procedures, and technical basics required for the Technician license. Always confirm the question pool revision date printed inside the front cover matches the FCC mandate before relying solely on any single study resource for exam preparation success and thorough preparation.